
Requirements
These are two things you need in order start using MyDigitalLabel
1. A website
To use all the great things MyDigitalLabel has to offer, you first need a website.
- Domain name <something>.com – This is where you will link to
- Webspace (hosting) – This is where the data is stored
Once you have a domainname and webhosting, you will need Worpdress

2. WordPress
WordPress is a free, open source, content management system. It is used to actually create a website on the webspace described above.

2.1 Check if WordPress is installed
Do you want to check if your website is using WordPress?
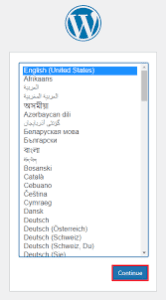
Add /wp-admin at the end of your domain name, if you see the logo to the left then you are using wordpress.
2.2 Installing WordPress
Installing Wordrpess is easy, however if you are unfamiliar with building websites it can still be daunting. WordPress is the most popular CMS in the world, therefore your webhost probably has an easy way to instal it. Google the name of your webhost and add ” install WordPress”, you will probably find an article describing how to install WordPress.
If the method above doesn’t work for you, WordPress has a tutorial on installing WordPress as well. Find out how to install WordPress
3. Download MyDigitalLabel
MyDigitalLabel is designed as a WordPress plugin. ” Plugins are tools to add extra features to a WordPress site, created by many people and companies in the WordPress community”.
4. Install and activate MyDigitalLabel
- Log-in to your website’s backend (go to /wp-admin)
- On the left side, click on Plugins.
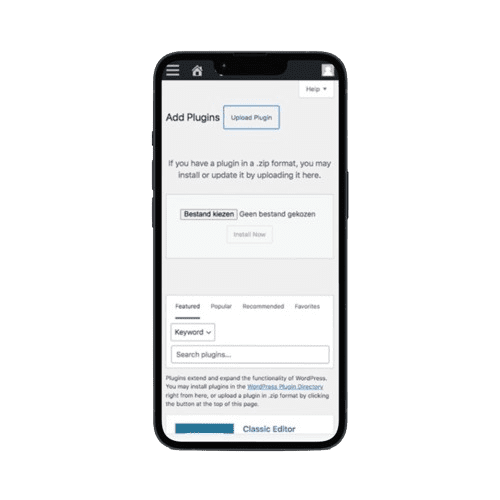
- On the top of the page click on “Add a new plugin”
- Again at the top click on “Upload plugin”
- Search for “MyDigitalLabel.zip” (which you downloaded earlier) and click “Install now”
- Click activate plugin
MyDigitalLabel is now installed and active!
5. Set-up MyDigitalLabel in 4 steps
1. Upload license
Upload the license.txt file that you received, to unlock MyDigitalLabel
2. Authenticate Autopilot
Log into Spotify using your account and allow MyDigitalLabel.
3. Add Spotify artist url(s)
Desktop
You can get the Artist URL on any artist profile.
- Go to the artist that you want to add, probaly yourself or someone you represent.
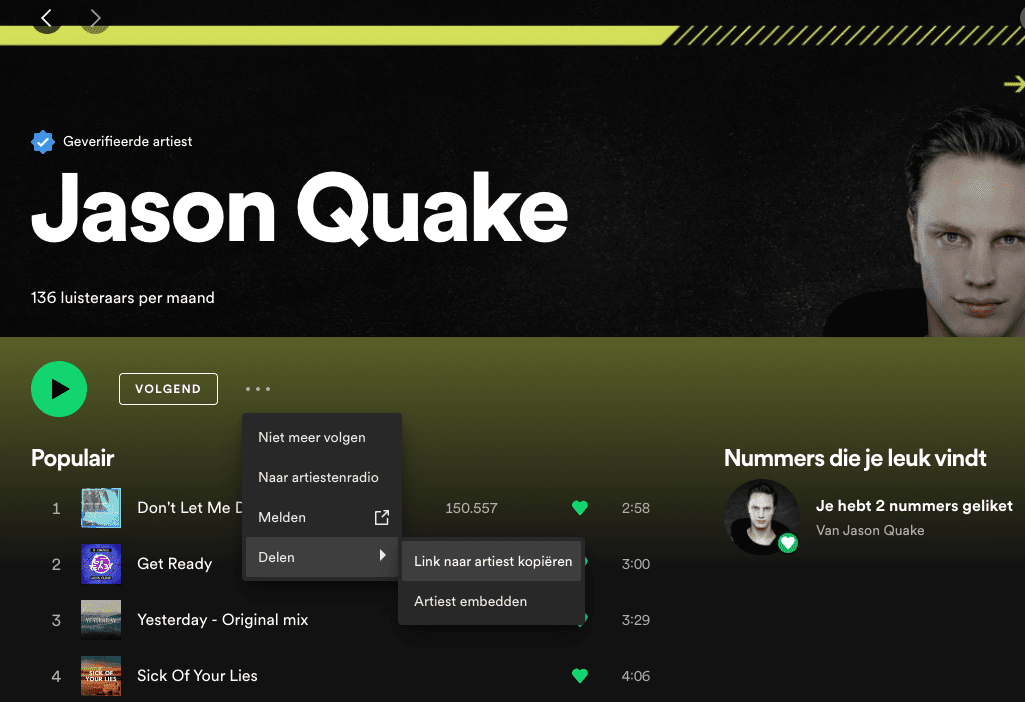
- Click the 3 dots -> Select share -> Copy link to artist
- Paste the copied url in the Artist URL Field in Autopilot settings

Mobile
- Go to the artist that you want to add, probaly yourself or someone you represent.
- Click the 3 dots
- Choose Share (or your local translation) in my case it says “Delen”
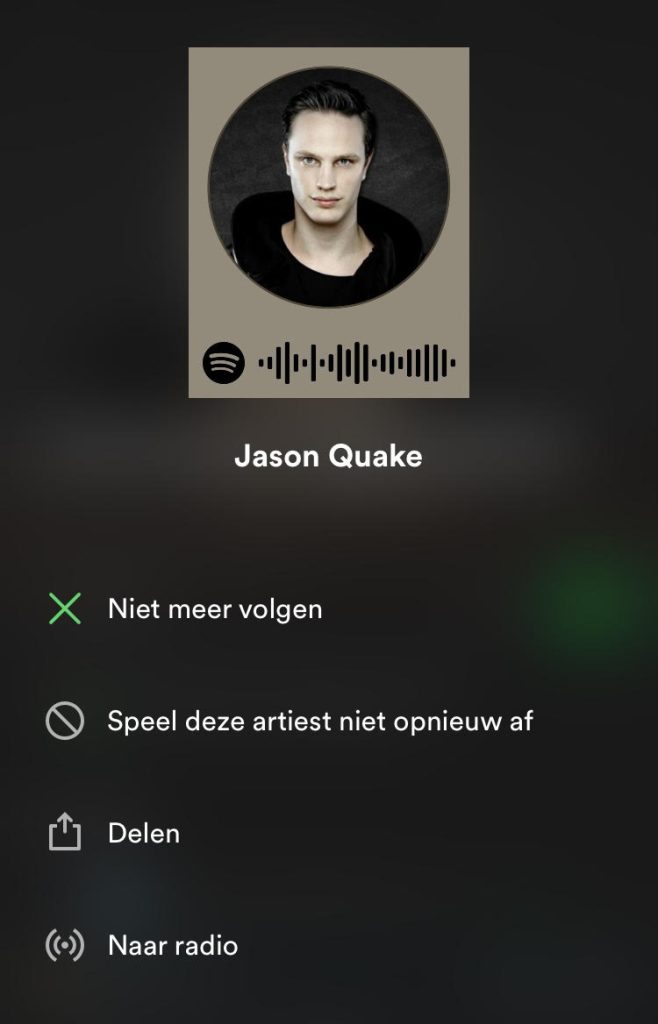
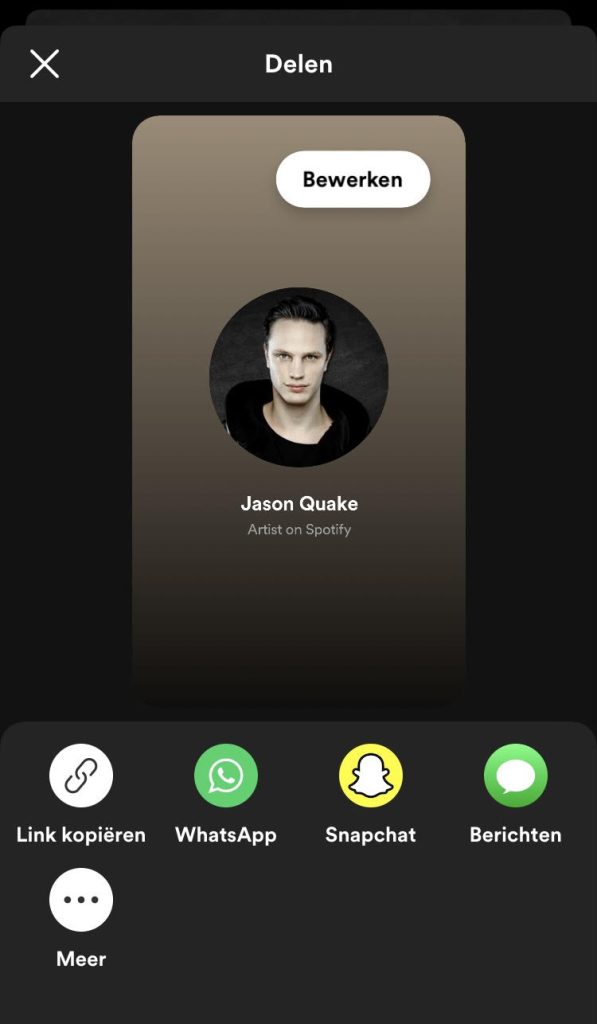
- Click copy link (or your local translation), or in my case it says “Link kopieren”
Paste the copied url in the “Artist URL” Field in Autopilot settings
4. Select Frequency
Select how often the MyDigitalLabel Autopilot will activate in order to check and update your website. “Daily” is recommended!
5. Innitialize Autopilot
Innitialize Autopilot to search and add all music to your website by clicking the button “Innitialize Autopilot”
All set! You are now able to discover all the features MyDigitalLabel has to offer!